Protect Cells
Cells may have protection applied to them in SecureSheet, which prohibits changes from being made to those cells. Typically, header rows and column label row(s) have protection applied to them through the Protect Cells tool in SecureSheet.
Only SecureSheet administrators may protect/lock and unprotect/unlock cells.
When you create your SecureSheet without borders and you apply the cell borders property to a View, any unlocked and unprotected cells will have a border around them.
Header cells will not be locked unless you (or another SecureSheet administrator) lock them, so if you see cell borders around your header or label rows, they need to be protected/locked for only your border formatting (from Excel) to remain.
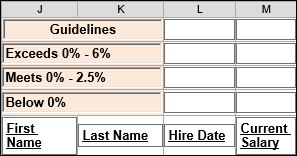
Unlocked or unprotected cells look like this (there is a beveled edge around them):
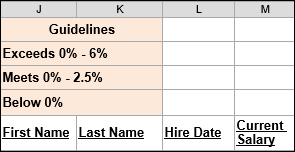
Locked or protected cells look like this:
Video: Protect Cells
Protect/Lock Cells
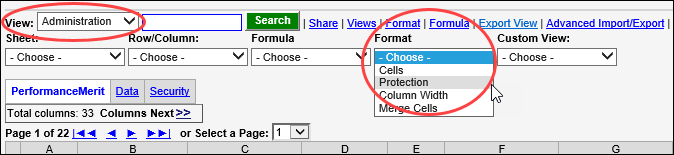
- Select Administration from the View drop-down.
- Select Protection from the Format drop-down.
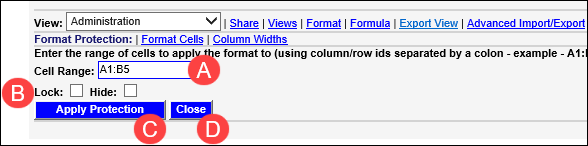
A. Enter the Cell Range: that you want to lock/protect. Include all header rows.
B. Check Lock.
C. Click Apply Protection.
D. Click Close.

UnProtect/Unlock Cells
A. Enter the Cell Range: that you want to unlock/unprotect. Include the entire cell range you may want to update.
B. Leave Lock unchecked.
C. Click Apply Protection.
D. Click Close.
- Edit the cells you want to update. Use the Administration view or your All Data (Edit) view to make the updates.
- Protect/Lock the cells to prohibit them from being updated by end users.
NOTE: Because header rows are protected, if you import and expected border changes to take affect, they might not if the cells were not unprotected before import. You do not need to unprotect header cells to make value, formula or format changes to them.