Set Up Add Rows View
Once a SecureSheet is live, you may need to add rows if a team member(s) need to be included in your active planning cycle. As part of standard setup, your SecureSheet will have an Add Rows view that you use may use to easily add team members to SecureSheet online.
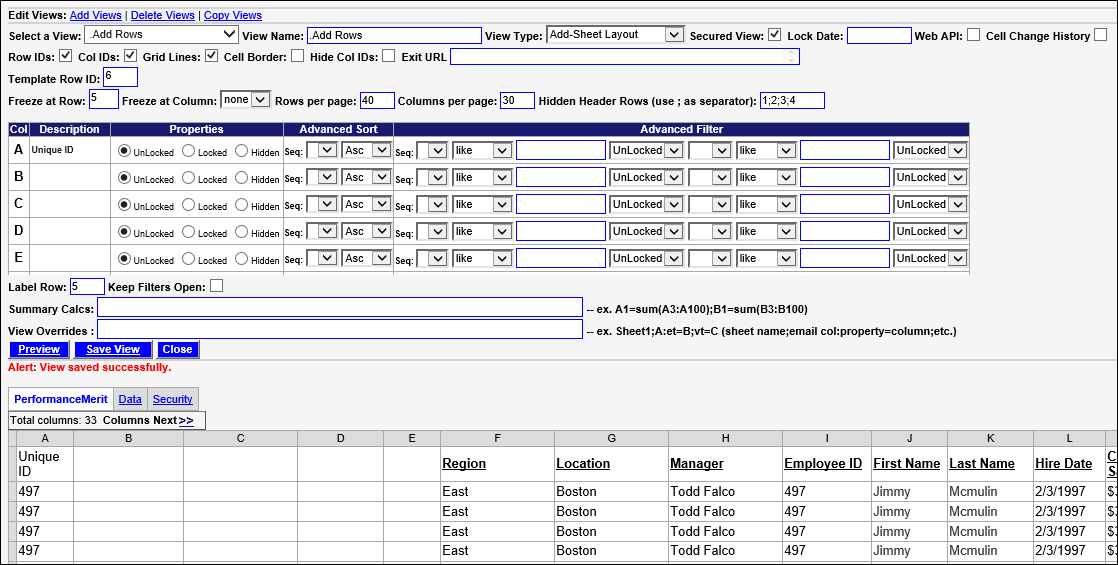
Create a data maintenance view called Add Rows. Characteristics of this view include:
- Only value-based columns are set to UnLocked.
- All columns with formulas must be Hidden.
When you save the new rows, SecureSheet will automatically copy down all the formulas from the template row to the new row(s) and any calculations in formula columns will take affect at that time.
Once the view is set up, you can:
- Enter values directly into the value-based columns and save the new row(s).
- Copy values from Excel and paste them into the view, then save the new row(s).
Notes on the number of rows in an Add Rows view:
- If you are adding rows to a tab where there are no existing data rows beyond the template row that has your formulas in it, there will only be one row in the Add Rows view. As rows are added, the number of rows available in the Add Rows view will increase (so you could copy/paste values for multiple new rows at once).
- When this is your scenario (no existing data rows), the alternative approach to having multiple template rows available from the start is to designate several rows as "template" in your excel structure, and leave their values empty. They would always be in your SecureSheet exports as "template" rows, but these rows can be filtered out of the main end user views.
- If you already have many rows of data on the tab where you are adding new rows, the number of rows displayed in the view will equal what you have specified in the Add Rows view properties (Rows per page).
Set Up an Add Rows View
- Have an exported copy of your SecureSheet available for reference. As you create this view, you will need to identify all of the value-based columns versus the columns that are driven by formulas.
- Add a new view. Name it clearly so that you know what it will be used for, e.g., Add Rows.
- Select Add-Sheet Layout from the View Type: drop-down.
- Enter the first row of data in the Template Row ID: field.
- List any header rows before your column label row in the Hidden Header Rows: field.
- Click Add View.
- Edit your new view.
- Set the columns Properties to UnLocked or Hidden so you end up with only UnLocked value-based columns in the view accordingly:
- Set every column that is driven by a formula to Hidden. Use your Excel file to check which columns are formula-driven.
- Set every column that is extra/blank to Hidden.
- Leave every column that is a value only set to UnLocked.
- Click Save View.
- In the preview section of the view, you should see the column labels for only value-based columns.
- You will see the data values from the Template Row you identified for the view on several of the rows. This is okay.
- Click Close.