Lock Users from Updating Data
During your planning cycle, you may want to prevent a user or a group of users from entering data into SecureSheet and/or seeing data in SecureSheet for a certain time period. Scenarios may include:
- Lower level managers input their data before upper level managers, and you want to lock out upper level managers until it is their turn.
- The deadline for data entry has passed, managers may view data but not make any changes.
- Managers cannot see data during the calibration phase.
- Managers can only view data during the calibration phase before exporting statements to communicate compensation changes.
- A manager is in transition mid-cycle.
SecureSheet has different approaches to prevent users from making changes to data in SecureSheet; you may choose to apply one approach or multiple approaches depending on your process:
- Set the Lock Date on each end user view. Users can still access their views, but depending on the way you set the lock date, they will be able to see their rows of data or only see column headings in their view(s) with no data rows. This supersedes the UnLock settings on the columns in the view. This also applies to every user who is able to access this view. If you need to be more specific in your locking approach, consider approach 4 below.
- Lock the SecureSheet. Users will be able to see their rows of data but not be able to make any updates. Locking a SecureSheet supersedes the UnLocked setting on the columns in the view.
- Set all UnLocked columns to Locked. (Note: In next year’s cycle, you will have to adjust the column settings back to UnLocked).
- Set a Lock Date on your Users tab for each user to customize locking each user from each view individually (in your Users-Views SecureSheet).
- Lock users by updating their sharing permission. (Note: The other locking options are more commonly used; this approach is an "extra" admin step for your reference/consideration).
- If you do not want end users to see the SecureSheet at all before they are able to export statements, hide the SecureSheet.
Video Resources:
- Locking Views Using a Lock Date and Time (on a View)
- Lock Each User with a Lock Date (on the Users tab)
Locking Views Using a Lock Date/Time
When you apply View locking, the locking rule is set for all Users with access to that View. You can update the locking rule on any View at any point in your planning cycle.
- After logging in, click Views.

- Select the View from the Select a View drop-down list to update its locking rule.
- Set the Lock Date on the View according to the Lock Date and Time Rules below.
![]()
|
Lock Date and Time Rules |
|
|
Lock Date Example |
Result for End User |
|
11/8/20 12:01 PM |
Locks and hides the rows |
|
11/8/20 12:02 PM |
Locks the rows |
|
11/8/20 12PM |
Locks the rows |
|
11/8/20 |
Sets to 11/8/20 12:00AM – Locks the rows |
- Click Save View.
- Repeat Steps 2 – 4 for each View that needs a locking update.
Lock Each User with a Lock Date on the Users Tab
On the Users tab, in each view's respective lock date column, add the lock date you want per user. If no lock date, the view stays open. If needed, a different lock date can be set per user per view.

In this example, the SVP Lock Date for Todd Falco will lock the SVP view on 6/29/2023 at 12:00AM ET. If you don’t want a user to see the data in the view, setup the lock date as 6/29/2023 12:01AM. This will suppress the detail rows from the view. Either way, the user will see a message that the view is set to view only.
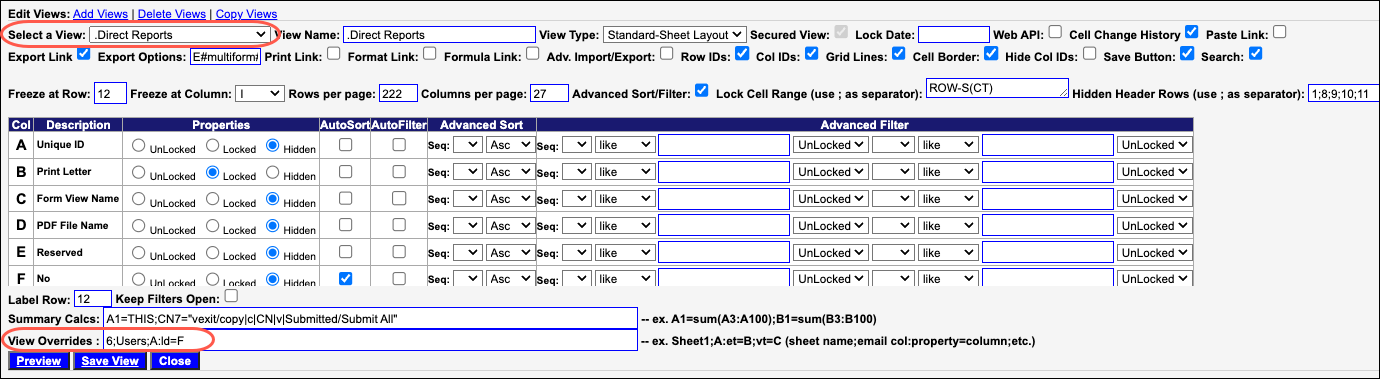
When using this appraoch, the following syntax needs to be added to the View Overrides line in the View Setup on each end user view:
6;Users;A:ld=F
Where:
- 6 is the SecureSheet number of your Users-Views-2023
- Users is the name of the tab where the lock date will be found in column F for the view (in your Users-Views SecureSheet)
- A is the column with the user’s email on the Users tab
- ld stands for “lock date”
- F is the column where the lock date is located on the users tab for this view
Locking Users through Sharing Permission
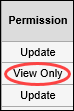
When you want a user or a group of users to be able to view their data and not make any updates, you may change their permission to View Only by updating their Sharing profile. This allows you to leave a subset of users with Update permissions if you need to, in case they need to make last-minute changes, for example.
- After logging in, click Share.
- The Share page appears. Follow these steps to update Permission to View Only for a group of users:
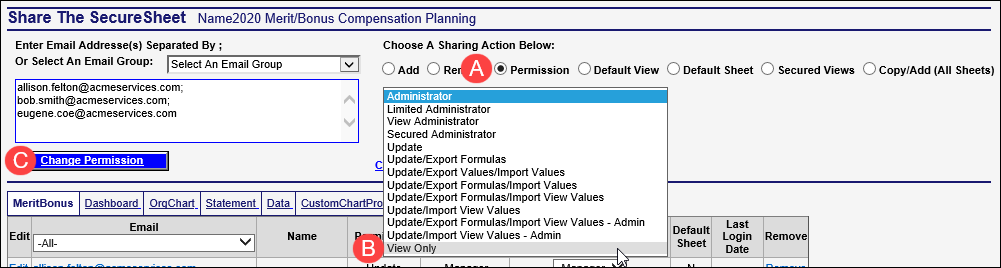
- Enter the email addresses in the Sharing box at the top, separated by a semi-colon.
- Click the Permission Sharing Action button.
- Click Change Permission beneath the Sharing box to enable your update. The permission for each of the users in the Sharing box changes to View Only in the Sharing table.
When you are finished, click << Go Back or log out of SecureSheet.