Set Up Views for End Users to Export Statements
Anyone in the organization can be given access to a view in SecureSheet that allows them to export statements. Managers at any level and HRBPs may have the ability to export statements for their respective teams.
When export functionality is added to a view, it allows individual statement export as well as batch statement export; the batch exports all visible rows in a view. A view may be filtered to a specific set of team members prior to exporting a batch of statements.
If you need to specifically audit the statement communication process, in the SecureSheet audit trail, you can see which managers exported statements from SecureSheet.
If you have more than one statement for your employees (e.g., more than one language), you will need more than one batch export view for your end users. Only one statement format can be exported in a batch from a view. For example, you might have an Export Statements - English view that exports the statement in English and an Export Statements - French view that exports the statement in French. You cannot have one view that exports both versions. The SecureSheet Support team can assist with this view set up as needed.
Videos:
Set Up Views for End Users to Export Statements
Determine who in the organization needs to export statements, for example, HRBPs and Level 1 Managers. For each user group that needs to export, there are two approaches to choose from to set up statement exporting.
NOTE: You may add statement export functionality to an All Data view so you can test exporting statements (individually and in batch) as an administrator, prior to opening up the capability to your users.
There are two main ways to approach views that your users can use to export statements:
- Use Existing Views - The most straightforward approach to set up statement export functionality is to use existing views.
- Click Views.
- Select the view that you want to have statement export functionality.
- Put a Lock Date on the view(s) from which users will export. This allows all the columns in the view to be visible and prohibits any updates from being made in any columns set to UnLocked (i.e., it supercedes the UnLocked setting).
- Turn on the Export Link checkbox.
- Enter #multiform#C;D;Click Here to Export Statements to PDF Format#HideLS in the Export Options: field, where:
- C is the view name to export
- D is the PDF file name to export
This allows statements to be exported in batch from this view.
NOTE: If you had this specific end user view set up with the ability to export to Excel, and you still want users to be able to export the view to Excel, keep the "E" in front of the Export Options syntax, for example: E#multiform#C;D;Click Here to Export Statements to PDF Format#HideLS. This will give the users the option to export to Excel or to export their statements to a batch file when they click Export View.
- Set Column B to Locked, which is the column with the Export Statement link.

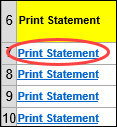
End users will see the print statement (or export statement) hyperlink in their respective view:
- Create Export Statement Views - If you want to minimize visible columns in the view that is used to export statements, you may consider this approach.
- Add new or copy existing views and modify for export statements view(s). If adding new views, make sure the appropriate security filters are set in each view (refer to the filter(s) in the data collection view that was created for each user group for which you may be adding a new export statement view).
- Turn on the Export Link checkbox.
- Enter #multiform#C;D;Click Here to Export Statements to PDF Format#HideLS in the Export Options: field.
- Make basic information columns visible in the view.
- Set Column B to Locked, which is the link to export the statement individually.
- Share the new view with the appropriate user group(s).