Work with Data Validations
Data validations work in SecureSheet as they do in Excel:
- Any data validations that exist in your compensation Excel file are imported into SecureSheet when it is initially created.
- Any data validations that you add to your compensation Excel file through the Import/Export process are imported into SecureSheet when you select the Data Validations property in the Import Values/Formulas/Formats tool.
When a SecureSheet is live, there may be a scenario where an administrator wants to add or modify a data validation online. This is possible using the administrator tools in SecureSheet. There are two ways to add or modify data validations online:
If you need to remove a data validation, you may remove it online.
Data Validation – Using a List
- Select the SecureSheet from your home page.
- Go to the applicable sheet within your SecureSheet where you need to add or modify a data validation using a list of values.
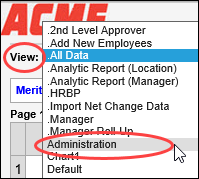
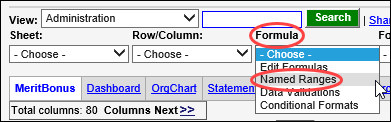
- Select Administration from the View drop-down.
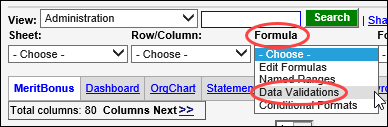
- Select Data Validations from the Formula drop-down list.
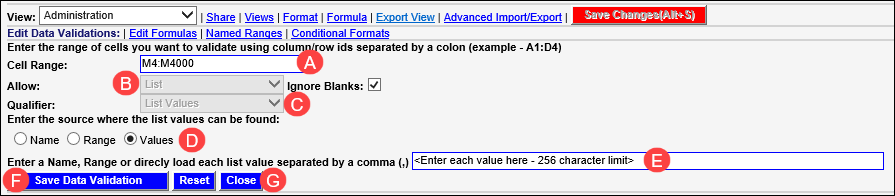
- Enter the Data Validation properties:
- Enter the Cell Range that you want to validate (go beyond your final row in case you add rows later).
- Select List from the Allow drop-down list. The Qualifier field will appear.
- Select List Values from the Qualifier drop-down list.
- Click the Values button to indicate the source where the list values can be found.
- Enter the list values in the list field separated by a comma.
NOTE: There is a 256-character limit in Excel and SecureSheet for entered lists, and no limit when referencing a Named Range. If you need to go beyond 256-characters, follow the instructions for Adding a Data Validation – Using a Named Range.
- Click Save Data Validation.
- Click Close.
Adding a Data Validation – Using a Named Range
- Select the SecureSheet from your home page.
- Go to the applicable sheet within your SecureSheet where you need to add or modify a data validation using a Named Range.
- Select Administration from the View drop-down.

- Select Named Ranges from the Formula drop-down list.
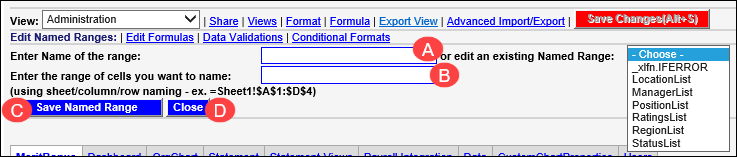
- Enter the Named Range properties:
- Enter Name of the range to create a new Named Range OR select an existing Named Range from the drop-down list to edit the properties of a Named Range already in your sheet.
- Enter the range of cells you want to name OR modify the range of cells if you are updating an existing Named Range. Be sure to follow the exact syntax as noted on the screen.
- Click Save Named Range.
- If you need to apply a new Named Range to a Data Validation, continue with the steps OR if you are finished updating an existing Named Range, Click Close.
- Click Data Validations to apply a new Named Range to a data validation.

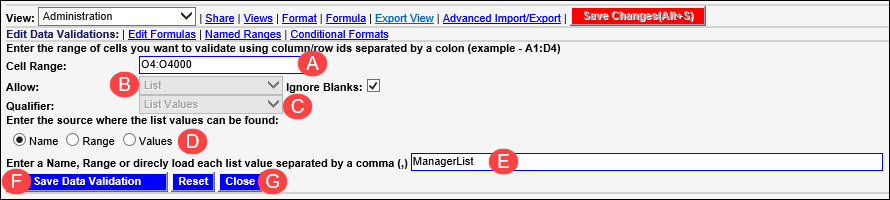
- Enter the Data Validation properties:
- Enter the Cell Range that you want to validate (go beyond your final row in case you add rows later). This must use absolute cell references (not relative B:B).
- Select List from the Allow drop-down list. The Qualifier field will appear.
- Select List Values from the Qualifier drop-down list.
- Click the Name button to enter the Named Range that contains the list values.
- Enter the Name of the Named Range.
- Click Save Data Validation.
- Click Close.
Notes about Data Validations
- There is no need to lock the SecureSheet if you are just importing Data Validations through the Import Values/Formulas/Formats tool.
Removing a Data Validation
- Select the SecureSheet from your home page.
- Go to the applicable sheet within your SecureSheet where you need to remove a data validation.
- Select Administration from the View drop-down.
- Select Data Validations from the Formula drop-down list.
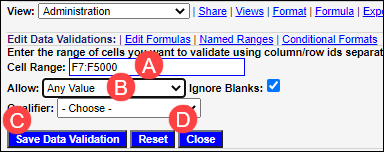
- Enter the Data Validation properties:
- Enter the Cell Range that you want to remove the data validation from (go beyond your final row in case you add rows later).
- Select Any Value from the Allow drop-down list.
- Click Save Data Validation.
- Click Close.